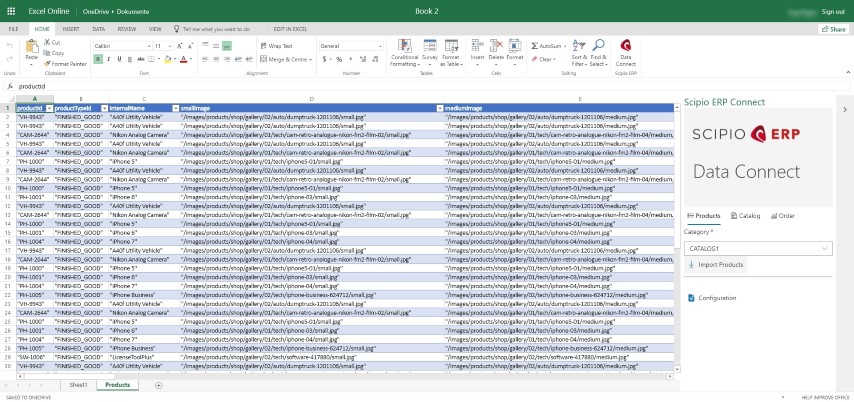
General
This plug-in component adds a generic access point to the system, which gives access to a large range of data from outside of Scipio ERP. It also comes with an Excel Add-In, which can be used to extract data.
What’s included
- Data Connect API including Entity Exporters and Importers API
- Excel Add-In
Installation
Addon installation
Scipio ERP provides a simple bash script to manage all addons. Detailed installation instructions are available on the Scipio ERP website. For help, simply type on the console:
./git-addons help
Excel Add-In Customization
This addon uses NodeJS and ReactJS to build the Add-In. You can find the Add-In sources in /webapp/dataconnect/src. To build the sources:
- Install node.js and npm: https://nodejs.org/en/download/
- Run npm install (in /webapp/dataconnect/src)
$ npm install
- During development run:
$npm start
or
$npm run watch
and point your browser to https://localhost:3000.
- For production deployment run
$npm run build
Excel Add-In Installation
A dynamic manifest file is created for you and can be accessed via
/dataconnect/control/scipio-erp-connect-manifest.xml
The manifest file should automatically set the correct server_url and context path. However, it is adivsable to check the generated file prior to installation. The manifest file contains all Add-In details and can be used to install the Add-In. Please follow the following detailed installation instructions:
Using a a shared network folder to a location of your choice and share the folder.
Please do not make your Add-Ins available to Microsoft AppSource, as it will require an additional approval process and will be made available within the Office Store.
Excel Installation
- Follow the installation steps as described for a Shared Network Folder installation, then select “My Add-Ins from the menu ribbon.

- Select “Shared Folder”
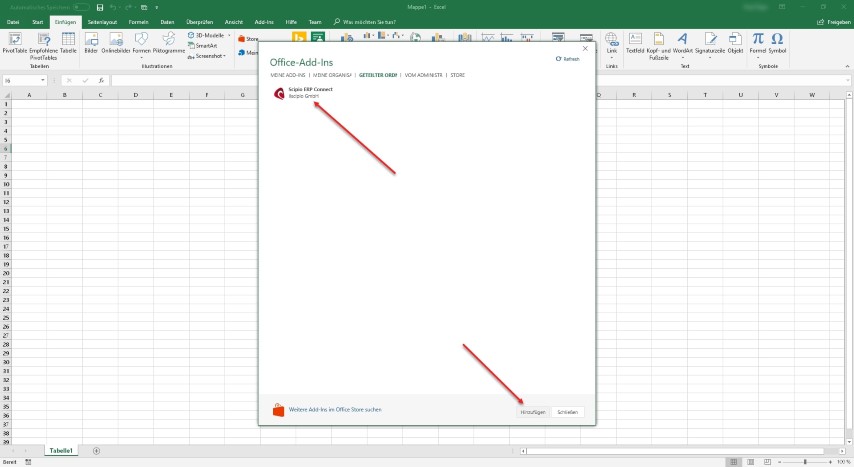
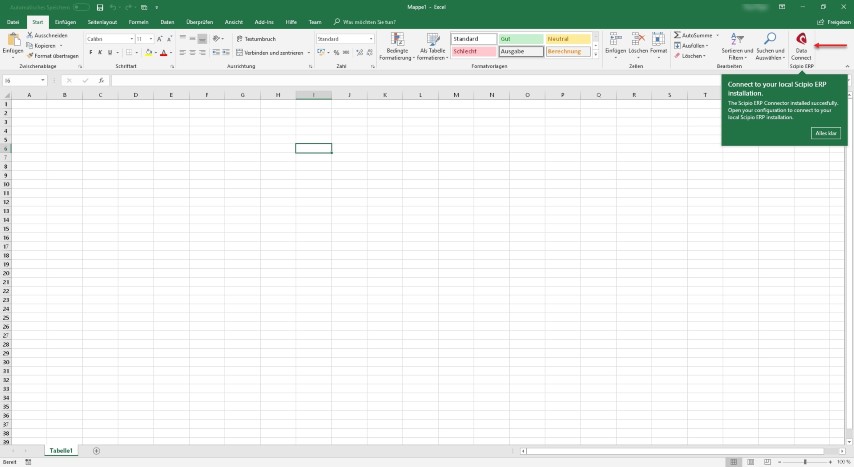
- Congratulations, you installed the Add-In. Click on the new “Data Connect” button
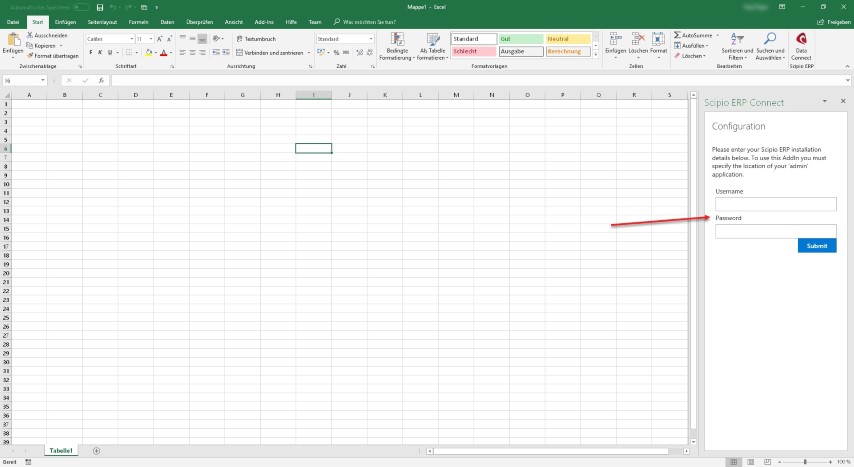
- The new Add-In window opens. Enter your credentials to connect to your Scipio ERP installation.
- Scipio ERP is now ready to be used.
Excel Online Installation
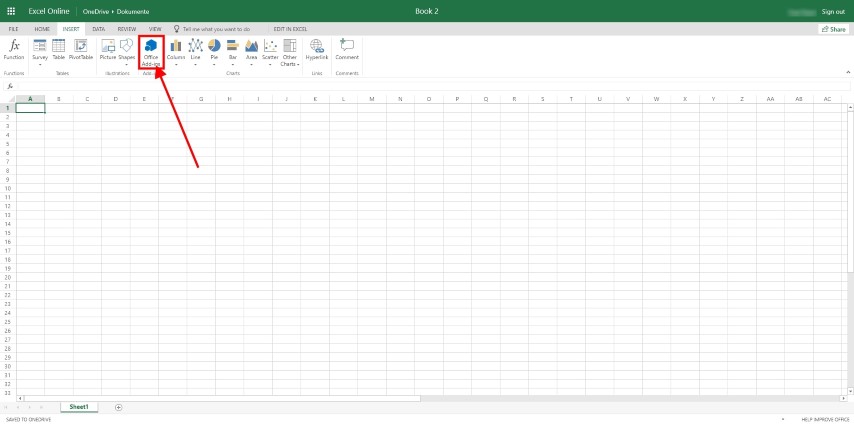
- Activate the Insert Tab on your menu ribbon and select “Office Add-Ins”
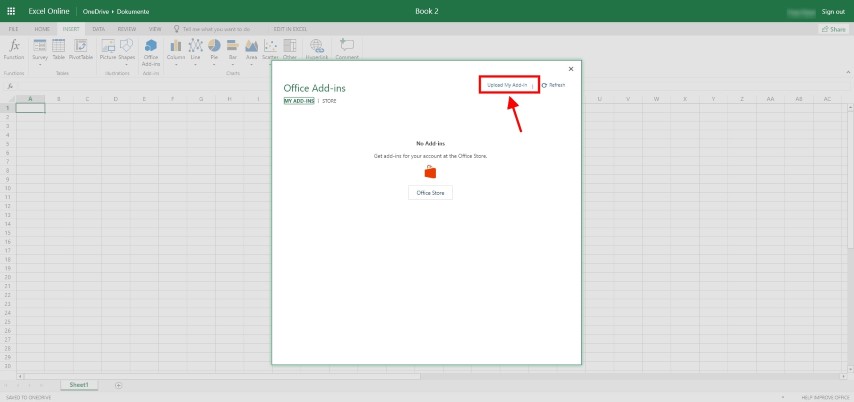
- Select “Upload My Add-In” from the popup window
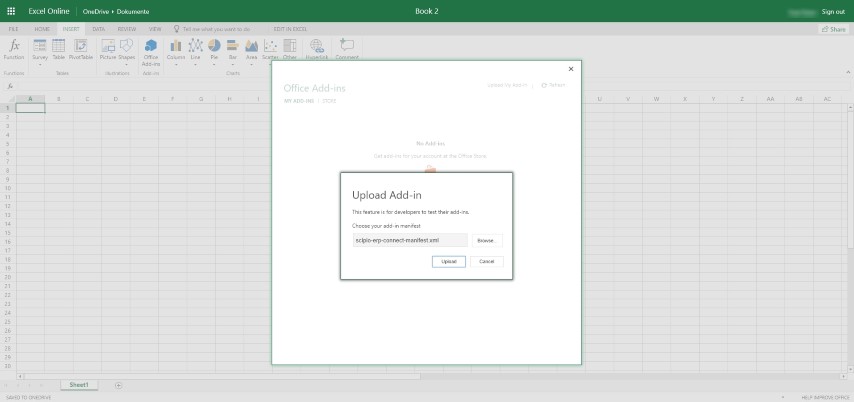
- Download your manifest file and store the file locally. Select “Browse” on the new window and select the manifest file.
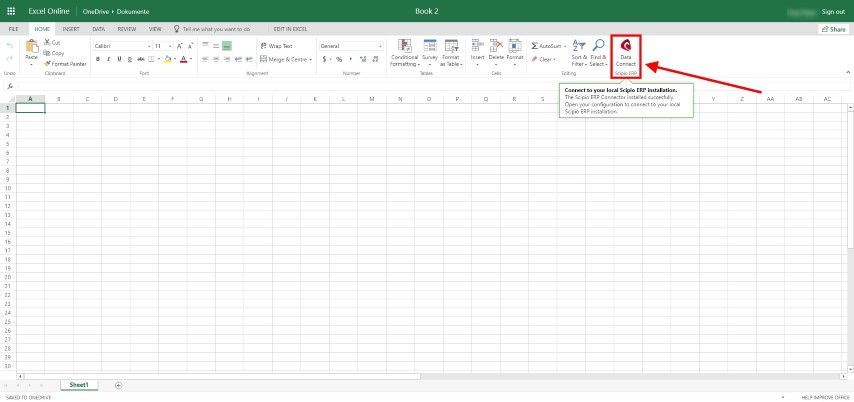
- Congratulations, you installed the Add-In. Click on the new “Data Connect” button
- The new Add-In window opens. Enter your credentials to connect to your Scipio ERP installation.
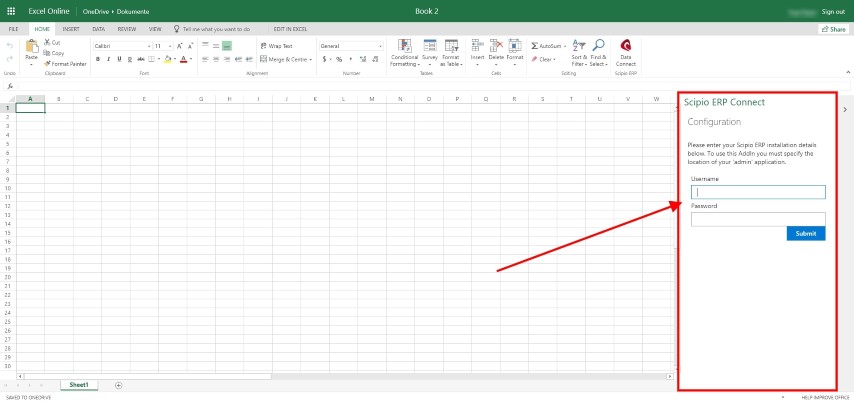
- Scipio ERP is now ready to be used.

Entity Exporters and Importers API
The Data Connect API includes entity exporters and importers which can be used using the functionality above as well as interact with various applications and servers. See the documentation.